giveaway winner

WINNER

Congratulations Kim L!! 

Kim wrote “love lives here would be my choice! It’s adorable, thank you for the chance to win one!”  Your free pattern is on it’s way to you Kim ♥♥♥

Thank you to everyone else who entered, the pattern is now available in my ETSY shop.
Happy stitching!
Natalie xx

new patterns and a ‘mini-adventure’

5 (2)

Hello again!

I’m back after my summer blogging break and I have been working on some new patterns that I’m super excited about.

I also joined the wonderful quilting community on Instagram – if you haven’t tried Instagram yet, I recommend it wholeheartedly!  There are so many lovely and talented quilters on there who freely share their ideas and advice – I find it such an inspiring place to be!  My username is @sewingroomsecrets if you want to follow along , I’d love to connect with you there!

It was on Instagram that I first came across the idea of a ‘mini wall’.  Let me explain – a ‘mini wall’ is a dedicated wall where you showcase all your mini quilts!  You simply display all your minis in a mosaic fashion to make a feature wall. And me, being a sucker for all things small and cute, I was hooked straight away 🙂  (Click here for an awesome example of a mini wall by the very talented Camille Roskelley – couldn’t you just die!)

I’ve had the most fun designing a trio of whimsical style minis and am super excited to share two of them with you today (number three is coming soon!).

First up is this little mini entitled ‘Love Lives Here’.

7 (2)

This one was inspired by a little block I made for a charity quilt. I had so much fun with this wee project and love how it turned out! And judging by your feedback on Instagram and Facebook you guys love it too!  Thank you so much!

Finishing up at around 20.5″ square, the pattern uses easy raw edged applique techniques and a simple patchwork border to create this sweet little quilt.

Heart.

banner

tree

IMG_8938

tree2

Next up is ‘Woof!’

cover2

Now as minis go, this one is definitely on the larger side (22″ x 27″), but still cute! See that little pup in the top right ? … he’s the cheeky one! 🙂

tongue..

Raw edged applique is used on this one too, along with a few basic embroidery stitches, making ‘Woof’ and ‘Love Lives Here’  suitable projects for even a relative beginner.

nose

And guess what? I’m planning a ‘mini wall’ in my sewing room – won’t that be fun! I think this may be the start of a ‘mini adventure’! I’ll be sharing pictures of all the minis I make in future posts and would love to hear what you think as my mini wall evolves!  I’m hoping to include some ‘pieced’ minis (all patchwork) as well as the whimsical style ones I’ve been working on. I’ll be utilising my own patterns as well as minis from some of my favourite designers, so there should be a good mix.

Well now, how about a mini-giveaway? I’m going to give-away a mini quilt pattern to one lucky reader on each of my Instagram and Facebook pages, as well as here on the blog.  That’s 3 chances to win!

For a blog entry, simply leave me a comment telling me which pattern you would like to win i.e. ‘Woof! or ‘Love Lives Here’.  Then pop over to Facebook and Instagram to enter there too if you like!  The giveaway is only open until tomorrow evening (that’s Monday, 7th September) at 6pm (GMT), so you need to be quick! I’ll pick a winner tomorrow night, but if you don’t want to wait until the giveaway ends you can grab your copy from my ETSY shop now.

Good luck and happy stitching!

Natalie xx

P.S. have you made any minis yet?  Leave me a link in the comments and I’ll pop over for a peak! 🙂

a little bit of whimsy

pillow front sewing room secrets

I didn’t intend to stitch a mushroom house.

But then we were challenged at our sewing group to make a 12 1/2″ block suitable for a child’s quilt, with a theme of ‘homes and gardens’. The quilt blocks will be donated to a charity called The Linus Project, sewn into quilts and given to sick children.  Great, I thought, can’t wait to get started!

It was the red and white polkadot fabric that caught my eye – that’s when the idea of a mushroom house began to take shape.

pillow angle2 sewing room secrets

So I appliqued the little house and a couple of clouds in the sky. But I didn’t stop there.  I love details you see.  I can’t help myself.  I stitched a crooked picket fence, a birdhouse, creeping vines, window boxes, birds, bees, bunting and roses around the door. Finally, some wisps of smoke billowing from the chimney (just to show that someone is home!).

flower detail sewing room secrets

embroidery detail2 sewing room secrets

bird house sewing room secrets

door2 sewing room secrets

When I’d finished, I soon realised that my whimsical little block wouldn’t really be suitable for inclusion in a child’s charity quilt that is likely to be washed repeatedly. Back to the drawing board to think of something else.

But I was determined not to let this cutie become just another UFO (unfinished object) so I made it into a cushion and added some sweet red & white binding around the edges (way easier than making piping!) .

cloud sewing room secrets

cushion on chair sewing room secrets

And speaking of cuties, I forgot to show you what I did with my little embroidered Harriet.  I framed her in a patchwork frame that I picked up at Ikea last year – it couldn’t have been more perfect for her! And the best part?  The frame was only £6! All I did was add a little wadding behind and some ric-rac around the inside edge to make it pop!

Harriet7

Harriet1

Harriet seems content in her new home 🙂

Natalie x


one way to bind a quilt

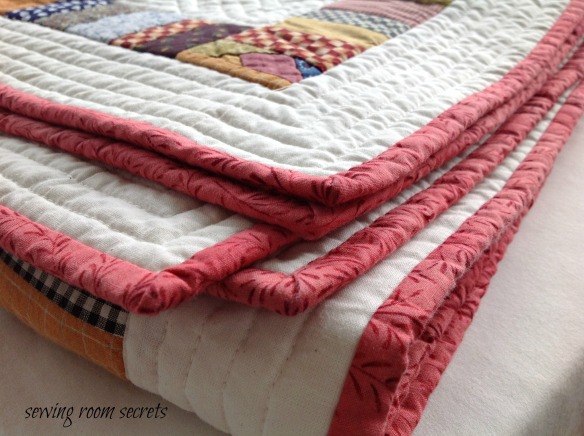
There are lots of ways to bind a quilt, but there is usually one way that we each turn to as our ‘go to’ method.  One way that works well for me is the technique that I am about to show you – I hope it is helpful for those of you who are just starting out on your quilting journey and are perhaps a little unsure of how best to frame your masterpieces 🙂

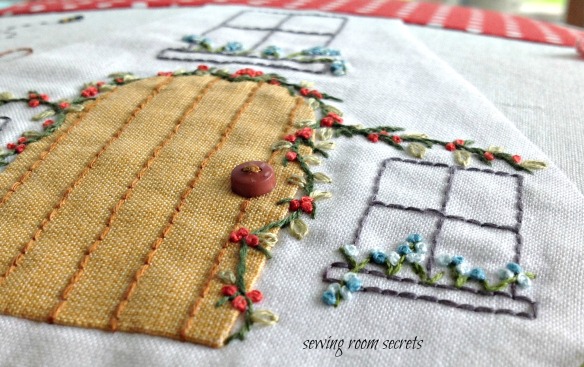
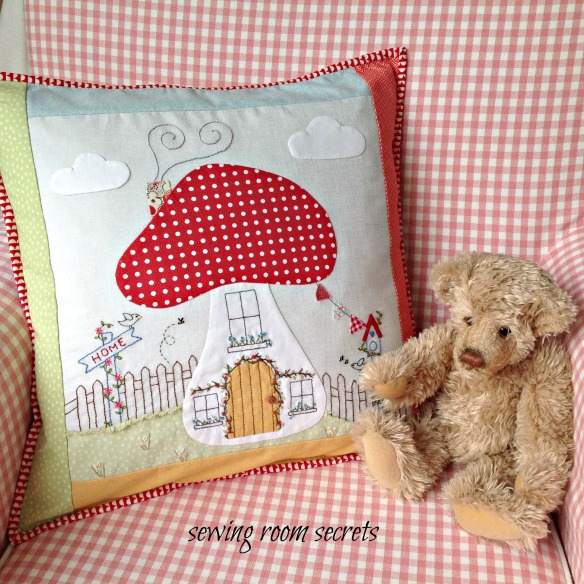
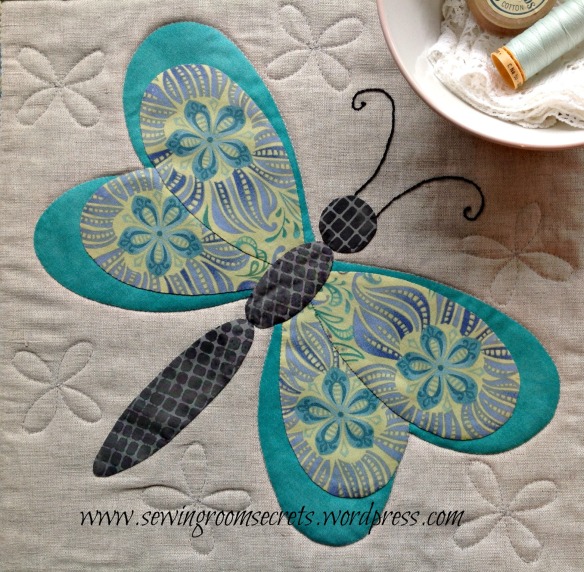
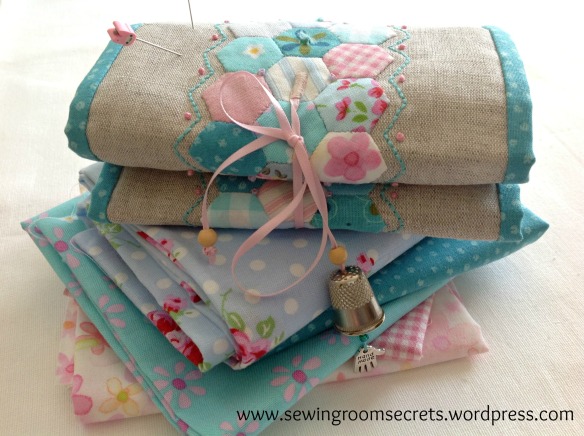
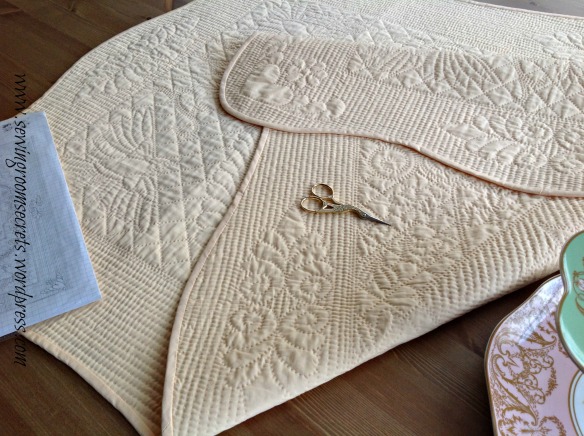
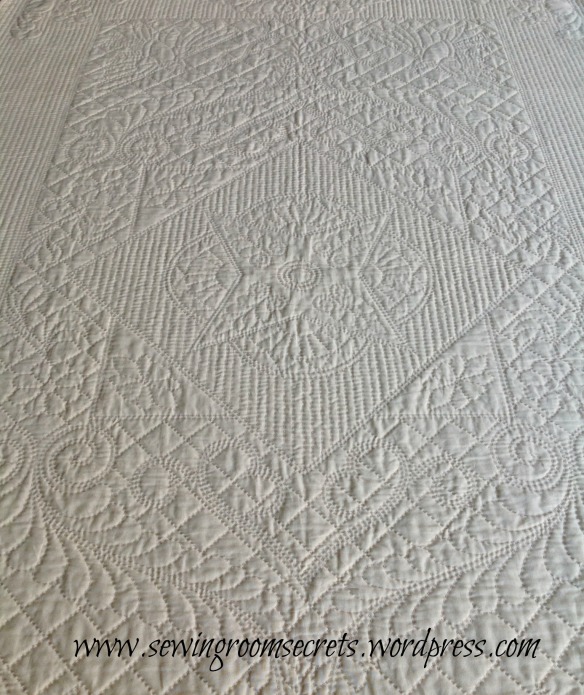
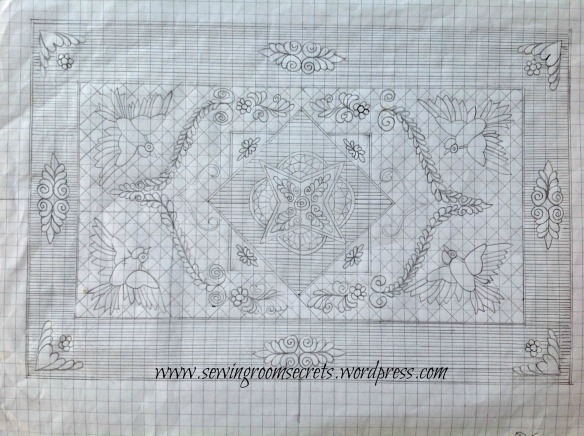
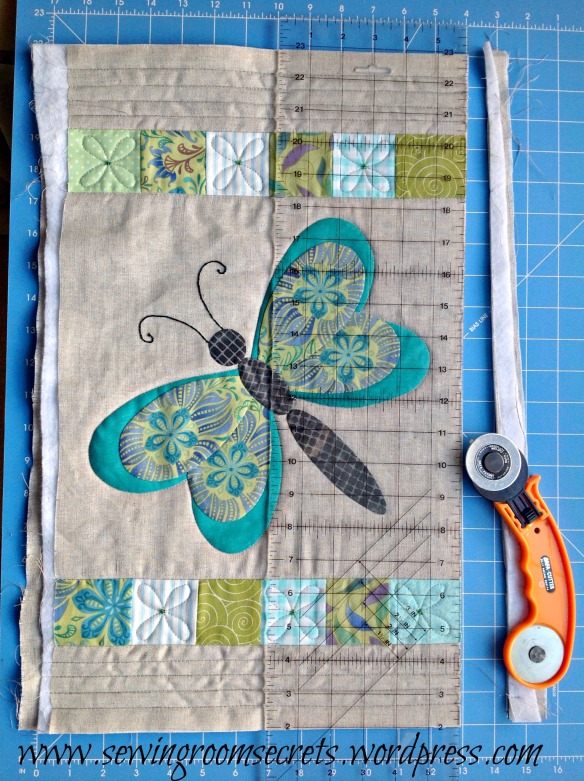
I’m using my little Zakka style butterfly table topper quilt to demonstrate, but the method works for any size of quilt, large or small 🙂

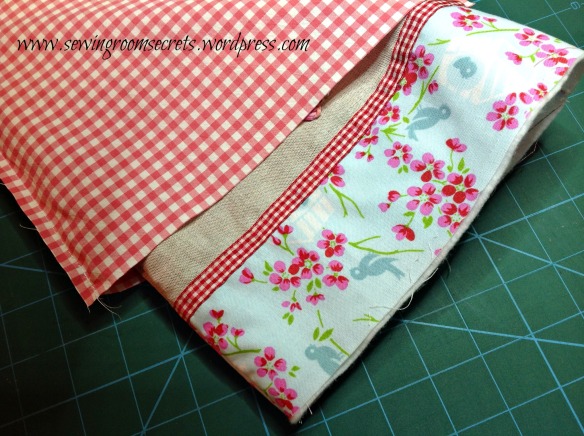
The first thing I do is trim the edges of the quilt

Trim sidesThen I calculate the amount of binding that I will need by measuring the perimeter of the quilt. In this instance, I am binding a small table topper quilt measuring 12.5″ x 21″, so the perimeter is the sum of all of the sides i.e. (12.5″ x 2) + (21″ x 2) = 67″.  Then I add about 10″, to allow for turning the corners and overlapping a little at the start and finish (I like to call these extra inches ‘wiggle room’ – love that expression!).  For this quilt I will need 77″ of binding.

Next I cut enough strips of fabric, which when joined together will give me one long strip of binding equal to the length I need. Now, this is where I differ a little from the norm in that I cut my binding strips 2¼” wide as opposed to the more widely used 2½” width. The reason I use 2¼” wide strips is because I like a ‘scant’ binding that sits snuggly against the sides of the quilt and I find that this width gives me the best finish.

For a large quilt I would cut the strips across the width of the fabric (from selvedge edge to selvedge edge), but for small projects, like this one, I sometimes cut strips from a fat quarter – it doesn’t really matter how you get there, so long as you make enough binding to go around the perimeter of the quilt, plus 10″ extra and without too many joins along the way!

Sew the strips together by placing two strips at right angles to each other, with right sides facing.  Draw a line diagonally from left to right like this …

Join strips

Then stitch on the drawn line and trim away the excess fabric leaving a ¼” seam at the join

Trim diagonal seam

Press the seams open so that the binding will lie flat when you apply it to the quilt

Iron seams open
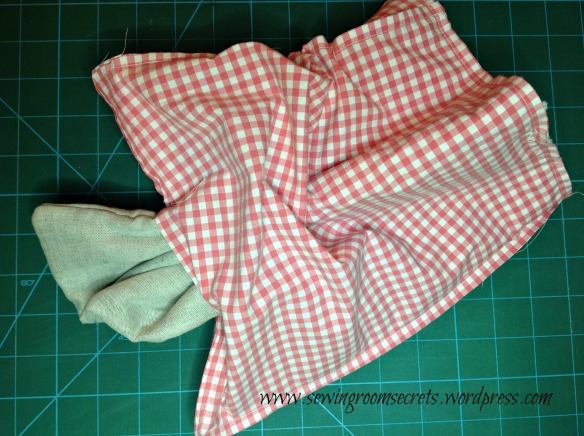
Once you have joined all the strips together in this way, press the entire thing in half lengthways, wrong sides together.

Binding Collage

You are now ready to apply the binding to your quilt! Before you start any stitching, open the binding strip and bring the top right hand corner down to meet the bottom edge of the strip like this

Open out

Fold the strip back together again.  This forms a little ‘flap’ into which you will tuck the end of the binding later …

Fold down

I usually start applying the binding at around the midpoint on the bottom edge of my quilt.  Place the raw edge of the binding against the raw edge of the quilt top and pin.

Pin to bottom centre edge

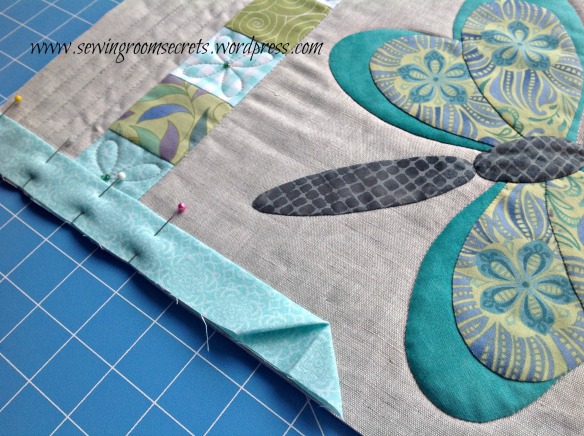
Next, I mark ¼” from the corner edge like this

quarter inch marker

To stitch the binding on, I use a walking foot and a 1/4″ seam.  I start sewing about 3 or 4 inches from the folded end and continue to sew towards the first corner. Now comes the important bit – stop stitching ¼” from the corner edge (your marker will guide you). Backstitch a few stitches and fasten off (but don’t cut your binding strip!)

Start applying binding 5 inches from point

Now I fold the binding strip straight up forming a 45˚ angle, then I fold it down over itself to create a corner and align the raw edge of the binding with the next edge of the quilt.

Pull up

Pull down

Corner

Start stitching at the top (backstitching a few stitches at the start), through the folded corner and all the way down the next side, stopping as before ¼” from the next corner like before. Continue to attach the binding in this way until all four corners are completed and you are a few inches from your original starting point.

Corner collage

Trim the end of the binding and tuck it inside the folded end that you started with like this, so that it overlaps by a couple of inches

Tuck end in

Fold the flap back down again and continue to sew over the original starting stitches,  backstitching to secure and fasten off.

Join.

Now turn the quilt over so that you can stitch the binding down to the back of the quilt.

It doesn’t really matter where you start, just fold the binding strip over from the front of the quilt to the back until it’s PAST the 1/4″ seam line that you made sewing the binding onto the front.

I use a ‘blind’ stitch to hold the binding in place at the back of the quilt. I hide the knot on the underside of the binding and bring my needle up through the fold in the binding

Hide knot Collage

Next I insert the needle through the quilt backing and tunnel into the wadding for about 1/2cm just under the folded edge of the binding. Then I bring the needle back out and into the binding, as shown below

Stitch technique

The secret to ‘blind’ (hidden) stitches is to catch only 2-3 threads with each “bite” of the binding and to take the stitch slightly under the edge of the binding fold. Aim for evenly-spaced stitches (½cm – 1cm apart works well). Be careful not to sew through to the front of your quilt!

Tip** You may choose to use clips or pins to help you hold your binding in place as you sew –  it is not necessary to place a large number of them at a time, just enough for the next section ahead. Personally, I usually just hold it in place with my left hand as I go (I’m right-handed).

Continue to blind stitch the binding in place until you come to a corner.  At the corner, fold the adjacent binding strip over to form a miter. Now bring your needle up through the backing to where the two binding strips intersect and make a stitch right in the corner by pulling the needle through both layers of binding. Make a few more stitches along the diagonal fold to secure the mitered corner.

Corner stitch Collage

Starting from the corner, blind stitch the binding to the next side of the quilt

Make few stitches in corner to secure

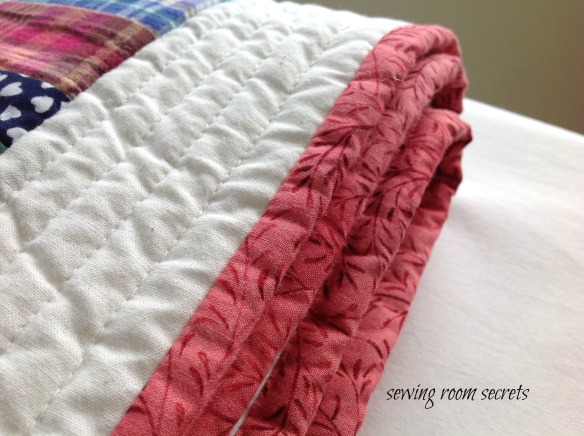
This is how the corner looks on the front

Corner 2

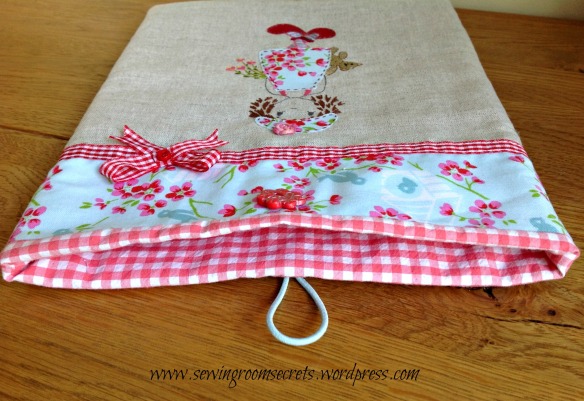
Continue in this way until you have stitched all your binding neatly in place.

Finished binding

Butterfly table topper2

That’s it – you’re done!   Time to start another project 🙂

Natalie x


‘sweet dreams’

Cover sewing room secrets.It’s funny where we get our inspiration from sometimes. I can’t say for sure exactly where mine comes from, it just kinda finds me somehow. Sometimes it’s a colour or a memory or just because I have a ‘need’ for a certain thing, so I try to figure it.

The inspiration for my latest little embroidery design came from an old sketch that I stumbled upon, in amongst some old photos recently.

Sketch

It was Christmas 1983 when I etched that little scene in my jotter at school.  I remember I was on ‘Library duty’ in the sixth form centre at the time and should have been using the time wisely to revise French.  But, as you can see, I had other things on my mind!

I should explain that the sixth form library was a partitioned off area in the corner of a much larger room. The partitions were made of floor to ceiling glass panels so you could see in and out of the library into the larger room/study area. There was always a teacher present in the study area to ensure that students were using the time productively to study.

Now I have no idea why I thought that the library was sound proof (call me naive or stupid – you choose) but that day, as I sat in the library on my own sketching my little Christmas scene, I began to sing ‘Jingle Bells’ at the top of my voice.  Oblivious to the fact that the entire sixth form could hear me, I then went on to sing other Christmassy tunes. I had belted out several renditions of ‘Rudolf’ before the teacher on duty got up from her desk and walked towards the library door.   As she stood in the doorway and barked “We can all hear you!!”, the entire room erupted with laughter (including me). Needless to say, I got a detention that day for my shenanigans, but on the up-side I managed to hide the little drawing and I’ve kept it all this time … 🙂

sketch2.

And now, more than 30 years later, I have sketched that little sleeping mouse again – only this time as an embroidery design. He looks like such a peaceful little soul, that wee mouse, gently snoozing under his quilt.

Sleepy head

I added some mini bunting above him, just for fun!

IMG_7739

I simply l-o-v-e-d stitching his little patchwork quilt. Cute, cute, cute!

full quilt.

I am gifting this little piece of hoop-art to my God-daughter to hang on her bedroom wall. I can’t wait to give it to her … hope she likes it.

IMG_7735

I’ve popped the pattern in my Etsy shop – it includes instructions on how to decorate your embroidery hoop and how to finish your hoop-art at the back too!  (I also think this little design would look super cute on a pillow or as a panel on a little tote bag )

IMG_7742..

 Happy stitching and ‘Sweet Dreams’ everyone!

Natalie  xx


‘simply retro’ granny squares

chair2

I recently got back from my annual sewing retreat where I enjoyed some ‘me’ time with my patchwork buddies. As usual, we did nothing but eat, sleep and quilt – no kidding!  It was the best time ever!

It’s amazing what you can accomplish when you don’t have to stop to make meals, do the laundry, vacuum, dust, go to work and all that real life stuff. In a few short hours I managed to stitch together the blocks for an entire quilt top!

The pattern is from Camille Roskelley’s book ‘Simply Retro’. I fell in love with the classic, fresh, retro look of this quilt … a lovely modern take on the humble granny square. I love it! And the best part? It’s fat quarter friendly – you only need 12 fat quarters and a few metres of white to make the top!

banister3

The simple do-able style of the giant 20″ blocks meant that the quilt grew pretty quickly too – hey, I like that!

banister4

Now I’m not gonna lie, I’m not a big fan of machine quilting (I much prefer to hand quilt) but, let’s face it, hand quilting takes time and some days you just wanna get it done, right? So … I opted to have a go at ‘edge to edge’ quilting on the machine. I chose wavy lines rather than straight ones, hoping to add some movement to the quilt whilst at the same time keeping it modern.  What do you think? 

quilting collage

apples

I finished it all off nice and neat with some cute red and white check 🙂

binding

on gate2

on gate

So there you have it … a quilt finished in just under 3 weeks (certainly beats 12 years!).

Phew! I’m off for a lie down …

♥♥♥♥♥♥♥

Happy stitching!

Natalie xx


thank you!

Just a quick post to say a massive thank you for all your lovely comments about my ‘twelve-years-in-making-scrappy-quilt’ (I really need to think of a catchier title 🙂 )

I am blown away by the reaction that my wee quilt story has sparked (over 2000 shares on Facebook – what?!?) – my word! Thanks you guys!

♥ ♥ ♥

Well now, what do you do when you finish one quilt?   I’ll give you three guesses, but you’ll get it in one … You start another one, right? Yay!

I’ve always fancied making a two colour quilt and have settled on this colour combo.  I’m going to machine quilt it this time though, so it shouldn’t take me another 12 years before I’m done!

Red grey fabrics

♥ ♥ ♥
 Happy stitching!
Natalie x


that moment when …

… you finish a quilt and you can’t quite believe it’s actually done!

That very thing happened to me today.

I put the final stitch in a quilt that has been on the go for at least a dozen years. Yep, you read that right, 12 years! So long ago in fact that I can’t even remember how the blocks were constructed! How bad is that?! Mile a minute quilt 009

The funny part is, the technique for making the blocks was called ‘mile-a-minute’ … let’s think about that for a moment.  There are approximately 1,440 minutes in a day, 525,600 minutes in a year and it has taken me 12 years to complete the quilt , so by my reckoning this quilt should measure around 6,307,200 miles!! 🙂

Mile a minute quilt 002

Mile a minute quilt 007

In my defense, it is entirely hand quilted except for the final border which I stitched on the machine.

Mile a minute quilt 017

Mile a minute quilt 021

Mile a minute quilt 023

Mile a minute quilt 022

Mile a minute quilt 019

Mile a minute quilt 012

Mile a minute quilt 011

hand quilting

I learned a thing or two during the making of this quilt.

For instance, I have learned that my choice in fabrics has changed A LOT in the last 12 years, which isn’t that surprising really given the huge array of fresh modern fabrics around these days. I could spend all of my wages on fabric, seriously … if only I didn’t have to feed my family and pay the bills! Darn, there’s always a catch!

I also learned that ‘scrappy’ borders are stretchy little suckers and need careful handling otherwise your quilt WILL end up with somewhat wiggly edges.

I learned that if you leave a quilt-in-progress in a heap on the floor of your workroom, it is highly likely that your pet dog will use it to sleep on. The same pet dog may also piddle on it, causing you to have to dunk it in the bath tub (the quilt, not the dog).  And, because you used a water erasable marker … yep, you guessed it … all your quilt lines will disappear!

Ironically, if you then re-mark the quilt lines and store your unfinished quilt in a cupboard for years on end the marks won’t come out completely, no matter how many times you wash it (true story).

But you know, for all it’s imperfections, I have also learned to love this quilt.  It may not have my favourite colours in it; it may not be my favourite design and my stitching may not be as neat as I would like,  but we’ve spent quite a bit of time together already, this quilt and I,  and we have come to accept that neither one of us is perfect.

And I am OK with that.

Mile a minute quilt 001

Mile a minute quilt 038Happy stitching everyone!

Natalie xx


tidying up can unearth long forgotten treasure

I came across these tit-bits whilst I was tidying up today

Lola threads.

And it got me thinking.

Those gorgeous orangey shades reminded me of a certain lil’ redhead that I stitched once upon a time. .. can ya guess who? For anyone new to my blog, this is the sassy little lady I am referring to

Lola21

Needless to say, the tidying came to an abrupt end and I grabbed my pencils and paper and this wee sketch emerged …

Lola sketch

I am going to enlarge the drawing big enough for a cushion cover. I think Lola will look very ‘chic’ in a wide-brimmed hat and I’m looking forward to weaving those gorgeous strands into her lovely locks…

… am I sounding confident?  Like I have a plan and know exactly how to proceed? Good, cos I’m trying to convince myself that I do :).  Truth is, I have had these threads for years because I have absolutely no clue how to use them!  I bought them many moons ago for no other reason than I just had to have them. They shone and sparkled and called to me and I knew straight away that I needed them in my drawer life!

I am not at all sure how I will work the threads in –  they are all different thicknesses to begin with, not at all like ordinary embroidery floss.  I guess that’s why they are so appealing…

Lola threads

But I like them.

A lot!

So I am inspired to give it a whirl and see what happens, plan or no plan! 🙂

Happy stitching!

Natalie x

love entwined … slow progress

I’m making very slow progress with my Love Entwined quilt …

The truth is, I found stitching the zig-zag border very tedious (there, I said it!) and that led me to abandon the quilt for a long time. Eventually, I did pick it up again and have been getting on with things a lot better now that the border is finished!

So, the first vase is now brimming over with berries and blooms and I  just need to embroider a few stamens to a couple of the flower centres.

LE flowers4

LE flowers1

lily2

LE flowers5

LE flowers3

LE flowers2

Now I’m working on the second vase of flowers …

Vase2

I apply tiny drops of Roxanne’s glue-baste-it to hold the pieces in place before stitching them down.

Roxanne glue-baste-it

This amazing applique glue dries in minutes, holds great and is 100% water soluble, with no harmful chemicals, dyes or waxes.  It also comes with a super fine syringe-like applicator which allows for controlled droplets of tiny beads of glue just where you need it! I find glueing so much better than pinning, since I don’t prick my fingers so much 🙂 That’s gotta be a good thing, right?  Cos who wants blood on their quilt?

berries

Fern

And, best of all, I get to combine embroidery and applique on this quilt too … *happy sigh*

embroidery2

embroidery1

small purple flower

.. and it was so worth it to persevere with that pesky border, cos the end result is pretty cool! I love the whole 3D effect with the zig-zags 🙂 This is how the whole thing looks from a distance …

photo.

Whether or not I ever go ‘all the way’ with this quilt remains to be seen (the finished size is 90″ x 90″ – yikes!), but right now I’m not looking too far ahead. One piece at a time is enough for me …

Happy stitching!

Natalie x


zakka butterfly

Butterfly table topper2

The patchwork group that I attend are hosting a BOM this year, with different members of the group demonstrating a technique or a block that they have enjoyed doing and are happy to share with everyone.  The idea is that you can either make a quilt with all the blocks or you can just do particular blocks that appeal to you and make them into cushions, mini quilts or other small items of loveliness 

I have been asked to host a demonstration on my preferred method of applique for the March block. Oh the pressure! Yikes! This wee butterfly block is what I intend to go with.  What d’ya think?

Applique butterfly

The finished blocks will be 12″.  I wanted to use my block to make a table topper, so I stitched six 2½”  squares either side of the butterfly and added a 3” inch strip of the grey linen that I love so much.  Then I finished the whole thing up nice and neat with some gorgeous aqua binding.

Squares3

Butterfly table topper3

I quilted some simple blooms here and there, adding a cluster of beads to some of the flower centres for a wee bit of sparkle …

Squares

Applique3jpg

Back2

Applique1

The method of applique that I use is often referred to as the ‘freezer paper and starch’ method.  I like this method best, because I like how the pieces hold their shape as I work with them and I can get pretty smooth edges too 🙂

Butterfly head

Applique4.jpqI used fabric from my stash, because I wanted the finished quilt to co-ordinate with the little Zakka style nesting boxes that I made for the bathroom.

bathroom set.

And what do you do when you finish a quilt and get that lovely fuzzy feeling of accomplishment?  Yep, you make a nice cuppa tea, settle on the sofa with a quilting book and dream about your next sewing project! 🙂

Afternoon tea

Happy stitching everyone!

Natalie x

fun fabric alphabet letters

photo 6

Whilst browsing on Pinterest, I came across this brilliant tutorial on how to make a fabric alphabet. What a fab idea! Not only is it a fun way to teach little ones the alphabet, but also a great way to use up your fabric scraps – win, win!

It was super easy and quick to stitch up and my little God-daughter loves using the fabric letters to learn her ‘A-B-C’.

photo 9

photo 8

And … as luck would have it … I found some alphabet themed fabric in my stash, which I used to make a nifty wee drawstring bag to keep them all in!

photo 12photo 11photo 13

fabric iPad sleeve tutorial


Harriet 005.

I had been wondering what I could make with a little embroidered piece that I stitched recently and finally decided on a new iPad cover.  I already have a ‘Smart Case’ for my iPad and, whilst I like the protection that the hard folding cover gives to the screen, the fact remains that it is a dull grey colour, a little grubby from fingerprints and well … just plain boring!

So, I wanted to pretty things up a wee bit and this is the result …

iPad cover1

iPad cover3

iPad cover2

iPad cover9

iPad cover7

iPad cover11

I made a slightly different version for my mother-in-law, adding her initial in embroidery on the front. I added a velcro flap at the top, rather than an elastic and button closure and I also quilted the background of the linen section.  I found some wonderful embroidery templates for monogram letters here.

iPad cover4

If you would like to have a go at making a fabric iPad sleeve, I’ve jotted down some quick instructions below on how I made mine.  You can do anything you like on the front cover – I used my new Harriet & her Teddy design on the front of mine (available in my pattern shop), or you can just keep it simple by using two pretty co-ordinating fabrics – just go with what you fancy!

Before we get started, I need to point out that I made mine big enough to accommodate an iPad4 and a Smart Case.  If you want to make a cover just for an iPad on it’s own, I would suggest using a 1/2″ seam allowance throughout (for a snugger fit), rather than a 1/4″ seam allowance.

So, what you will need is:

For the outside

  • 2 pieces of fabric 9.5” x 8.75” – for the bottom of the outside cover
  • 2 pieces of co-ordinating fabric 9.5” x 3” – for the top of the outside cover
  • 2 lengths of ribbon around 10” long, plus extra for the bow
  • 1 small button (for the bow centre) and a larger button for the closure
  • 1 adult hair elastic/ponytail holder (or similar thin elastic)

For the inside

  • 2 pieces of thin wadding (batting) 9.5” x 11.25”
  • 2 pieces of lining fabric 9.5” x 11.5” (the extra 1/4″ in length for the lining fabric is for the trim at the top edge)

*Use 1/4″ seam throughout

1. Cut out all the pieces before you start

Harriet 3

To make the outside cover …

2. With right sides together, stitch each of the two top pieces (9.5” x 3”) to the bottom pieces (9.5” x 8.75”)

Harriet 1

3. Cover the seam lines by stitching on some co-ordinating ribbon

Harriet 2

4. Make a ‘quilt sandwich’ by laying one 9.5” x 11.25” piece of wadding down on your work table first, followed by the front cover (right side up), followed by the back cover (right side down), and finishing with another 9.5” x 11.25” piece of wadding. Line up all raw edges and pin.

5. Stitch all four layers together using ¼” seam, leaving the top open. Backstitch a few stitches at the start and end of sewing to stop the seam opening when you turn it right side out.

Stitch all the layers together

6. Trim away the wadding to about 1/8th of an inch from the sewn line to reduce bulk, clip the corners and turn right side out. Push out the corners to give nice neat points.

7. Sew the elastic hairband onto the outside of the back cover by placing it in the centre and stitching over it a few times about an 1/8th of an inch from the edge. Allow a little of the elastic to hang off the edge (you will trim it later).

Harriet 11

8. Now take your lining fabric and place the pieces right sides together. Stitch down both long sides and along the bottom, leaving a 4” opening at the bottom for turning. Leave the top open.  Clip the corners, but don’t turn it right side out yet!

Lining

9. To join your outer cover and lining, keep your lining inside out & your outer piece right side out and slip the assembled cover inside the lining, matching up your two side seams. They should now be right sides together.

Harriet 10

10. Line up the top edges of the lining and the outside cover and stitch a ¼” seam all around the top edge. Trim away the excess elastic from the seam allowance.

Collage1

11. Gently pull the front cover through the gap that you left in the lining. *Tip:  I use a star headed screw driver to turn things out as I find that the little star head grips the fabric and helps things along 🙂

Harriet 512. Poke out the corners and press

Harriet 8

13. Stitch the opening closed

sew opening closed

14. Gently push the lining inside the cover.  You will find that a little of the lining will naturally fold around the wadding at the top edge to give a nice little trim along the top (that’s the reason why we cut the lining pieces that extra 1/4″ longer 😉 )

iPad cover12

15. Sew on a pretty button and top-stitch ‘in the ditch’ where the lining and the outside meet to give a neat finish (although it looks just fine without this step).

Top stitch to finish (optional)

ipadcover5

I have just begun to stitch another little version of Harriet & her Teddy, this time I am embroidering the entire thing on to soft white linen (no applique).  I’ve added tiny beads as flower centres and smocking at the top of her dress…

A pocketful of posies


… not sure what it will become this time, just gonna see where the stitches take me …

Natalie x


vintage-style zippered pouch

I have been on a wee bit of a sewing spree just lately. Not a marathon session or anything, more a case of a few stolen moments in my sewing room …

Cosmetic pouch patter npics 198

Anyhow, the result is that I have FINALLY managed to put together a pattern for my little vintage-style zippered pouch, which is now available as an instant download in my Etsy shop.

The pattern for this vintage-style zippered pouch is available in my Etsy pattern shop

I’ve written it in the style of a step-by-step tutorial and have included almost 50 close-up colour photos to help you along, The cool part about it being a digital file is that you can zoom right on in to the photos on your computer if you want to see the details even more closely!

Yo-yo

I have made lots of these little cuties for friends and family now, but this one I will definitely be keeping for my very own 🙂

Inside

Cosmetic pouch patter npics 200.

Suffolk puff embellishment2

Vintage-style zippered pouch1

zip open

And whilst I was in a creative mood, I came across a great tutorial for a fabric notebook cover and enjoyed putting together my own version from the left over fabric scraps.

Notebook5

Add second accent strip Collage

Quote

They make a lovely set … don’t you think?

set3

set2

 Happy stitching everyone!

Natalie x


one year ago today …

… I began my adventures in blogland with a very nervous first post from my sewing room.

To tell you the truth, I was not at all convinced that anyone would be the slightest bit interested in my ‘wee bits o’ nonsense’ (aka sewing projects).  But I was amazed how quickly I was made to feel welcome in the blogging community with lovely comments and words of encouragement.  Bloglanders are such a friendly bunch 🙂

Looking back over my blog I realize that I have created a colourful little journal of my life in stitches!  I didn’t think about that aspect of blogging when I started out, so it’s an unexpected and happy bonus!

Hexy flower side view

One year on and I would like to thank you all for reading my words, looking at my pictures, checking out my tutorials and for all your wonderful encouragement and amazingly generous comments! I can’t tell you how much you brighten my day by taking time out of your busy lives to share your thoughts with me!  It is particularly heart warming when someone tells me that they have been inspired by something they have seen on my blog! And I have to pinch myself when I see a Sewing Room Secrets project on Pinterest!  That still freaks me out every time! (in a good way!!)

I have picked out 12 of my favourite makes and posts from the past 12 months and hope you will humour me as I take a little trip down memory lane…

Little hexie needle caddy

Little hexie needle caddyIt’s a giveaway!

Etsy Collage

A treasury of applique

sewing-room-secrets-sewing-caddy11

Hexagons for Harriet

Harriet before applique

‘Lola’

Lola8

Zakka Style

fabric boxes11

Zakka inspired gift set

red-set-with-flower1

‘Morning Star’ … a journey of a thousand stitches

Morning star 20

How to make a Suffolk Puff

image

Time to just be me

My glasses case

Catching up …

Crafty Creatures

On white

Chocolate Tiffin Recipe

tiffin5

Thank you for your company this past year … having you along for the journey has really been a blessing 

●●●●●●●●●●●●●●●●●●

*Edited: I will be taking a step back from blogging for a while, as I will not be able to devote as much time to it in the coming months, due to other demands in my life right now. I will still be ‘around’, working on my Love Entwined quilt and drafting several new patterns for my Etsy shop, but unfortunately blogging will have to take a back seat for now.  I will try to pop back from time to time with updates when I can, but for now I bid you all a fond farewell and happy stitching!  Love & hugs, Natalie xx


happiness is …

…a pot of tea, an open fire and some quiet stitching on a Sunday afternoon

LE centre4

I’m working on a new appliqué quilt called ‘Love Entwined’.  It is an historic appliqué quilt dating back to 1790, which has been interpreted and re-created by Esther Aliu (you can read more about it here). Esther is generously offering this magnificent quilt as a free BOM over on her blog, if you care to join in 🙂   Just hit the button in the sidebar and it will take you straight to Esther’s blog.

Original LE Black & White

Not much is known about the original, other than it is from the Georgian Era, England, heavily appliquéd and is described as a ‘fine marriage coverlet’.  It will be a real labour of love and will probably take me in the region of two years to complete!!

LE centre2

LE centre3

It took me ages to get started … partly because I discovered it just before Christmas when I had a million and one other things to do, but mostly because I was nervous about the huge undertaking that this quilt represents.

I mean this is BIG! Not just in size (96″ x 96″), but also in the challenges that it poses.  It is an intense appliqué project and I have never attempted anything quite on this scale before. Yikes!

The first challenge was choosing the fabrics.  This is the part that, for me, takes forever as I keep changing my mind!  Laying out some fabrics on my work table helped a lot 🙂

LE fabrics3

The second challenge was the Mariner’s compass block as I have never done one before. It took a couple of attempts, but I got there in the end …

LE embroidered dots

The appliqué pieces on this quilt are an awful lot smaller than they look, but I have been getting around it with a few carefully placed embroidery stitches 😉   

Now that I have finished the centre circle, I think I am over the worst.  Yeah right, who am I kidding?

flower

applique flower2

… one solitary little embroidered flower added, only nine more to go!

What new challenges have you set yourself for the New Year?

Happy stitching!

Natalie x

in my element

I was in my element this afternoon.

The boys were out and I was ‘home alone’ … there was the mother of all storms blowing a gale outside, but did I care? Not one jot! Cos the central heating was turned up high and Bing Crosby & David Bowie were singing ‘Little Drummer Boy’ at full pelt, whilst I got to play with glue and glitter and wolf down a few home-made Christmas cookies! Did I mention the Drambuie? Well, that too.

Christmas cookies

The reason for all the glitter (and there was a LOT of glitter!) is this …

Teddy1

… a little bit of last minute present making in the form of a glittery, heart-shaped gift box to house a teeny, tiny teddy that I knitted for my God-daughter’s doll’s house.

Teddy2

I glued a wee suffolk puff to the lid as a finishing touch

Teddy3

Gift box2

Gift box1On the subject of gift-giving, I baked a whole heap of stuff this week and enjoyed giving lots of home-made edible gifts to friends and family

Christmas baking

Mince pie gift

Jars

Of course, I made sure to bake a little extra for us too 🙂

mince pies

The girls at work got the little Zakka style gifts I made for them and I wished them all a Happy Christmas. I am now officially on holiday for nearly two weeks! Yay! I am sooo ready for a break!

Gift1

Aqua set

Aqua cookie jar

Green set3

Green cookie jar

Rather than wrap the presents, I made some little gingham bows from ribbon, stitching them to brown paper bags and then I put the gifts inside.

Gift bags in a row

Gift bag ho, ho, ho

… and with the decorations up and the presents all wrapped, it really is starting to feel a lot like Christmas around here 🙂

Tree decs

Presents

Fairy

Christmas pics 097The little felt Santa in the photo is another present for my God-daughter. His tummy is a cut out circle and the hole is covered over with some see-through netting, so that you can see all the chocolate coins he has gobbled up!  There is an opening at the back of his neck to provide access to the chocolate and for refilling him.

So, as Christmas Day approaches, I will be signing off for a few days, but before I go I want to leave you with the recipe for my little Christmas cookies, which I call ‘Festival Pennies

Ingredients

  • 130g (4.5 oz) chopped hazlenuts
  • 250g (9 oz) unsalted butter, softened
  • 1 large egg yolk
  • 2 tbsp Cointreau
  • 55g (2 oz) caster sugar
  • 55g (2 oz) cornflour
  • 300g (10 oz) plain flour
  • Zest of an orange, finely grated
  • Few drops of orange essence
  • Icing sugar

Method

  1. Lightly grease a baking tray and preheat the oven to 180ْC (fan) / 200ْC / 350ْF / Gas mark 6
  2. Cream the butter and sugar
  3. Beat in the egg yolk, Cointreau and orange essence
  4. Stir in the orange zest and the hazlenuts
  5. Sift the flour and cornflour over the mixture and mix with a wooden spoon to a firm dough
  6. Break off small pieces and shape into a ball, then flatten slightly into round ‘pennies’
  7. Cook in the centre of the oven for 12 – 15 minutes (do not brown)
  8. Cool on a wire rack for a few minutes
  9. While still warm (but not hot), roll the cookies in icing sugar and coat generously. I often roll them in the icing sugar a couple of times to give them a good coating. Sift extra icing sugar over the top.

If you don’t have Cointreau or orange essence, you can substitute for brandy and vanilla essence and omit the orange zest. Sometimes, I will also add powdered vanilla pods to the icing sugar to make them a little extra special!

Now all that remains is for me to wish you and your loved ones the happiest of Christmas times.  Thank you all so much for your visits here, for all your lovely comments and support over this past year and to all who have bought my patterns.

Merry Christmas and a Happy New Year to each and every one of you!   Natalie x

Snowman

an early christmas present … or two!

There are some new additions to my sewing room thanks to a couple of early Christmas presents …

ribbon holder1

My ever resourceful Dad made the wonderful ribbon holder for me, which I absolutely love! (that goes for the ribbon holder and my Dad by the way 🙂 ).

I was going to wait until I had painted it before I showed you, but I just couldn’t wait! Isn’t it fab?

ribbon holder2

And my lovely Mum (who knows me only too well) gave me this fun little plaque for my wall

sewing forever wall plaque

* feeling blessed*

Who needs Santa? 😀 x

santa basket

Santa basket pics 032

This little guy has been a regular in our house for the last couple of Christmases. He’s a great little chap for holding all the Christmas chocolates and usually raises a few smiles.

Santa basket pics 011

He’s really easy to make, all you need is:

  • a shallow wicker basket
  • a polystyrene ball
  • a hot glue gun
  • some scraps of fabric and felt
  • polyester stuffing
  • craft goggle eyes, a button, ribbon and a small bell

… and this is how I made him

1. Cut a strip of fabric long enough to go around the rim of the basket and wide enough to cover the sides and extend around the base.  The basket I used had a diameter of 7¼” and a depth of 2¾” which meant I needed a strip of about 24″ x 5″ to include 1/2″ seam allowances.  Sorry I can’t give exact measurements here, as it will all depend on how big your basket is, but what I would say is make it a little bigger than you think you need, as you can always trim it down.

2. Sew a 1/2″ hem along the long sides. Next, with right sides facing, stitch the short sides together to form a fabric ring. Place the basket inside the fabric ring with the wrong side of the fabric facing the outside of the basket. Use a hot glue gun to glue the fabric all the way around the rim of the basket, like a skirt. (Be careful, that glue can be mighty hot!). Allow the glue to set.

3. Turn the basket upside down and place a little polyester stuffing between the fabric and the basket to pad out the sides before gathering up the underside with a running stitch (I used quilting thread for strength), pulling it tight like this. Fasten off securely.

Santa basket pics 018

4. Glue a length of black ribbon around the rim to act as a belt and added a button to the front.

basket

5. Cut another strip of fabric long enough to reach just over half way around the rim, to act as the arms.  The rim of my basket is approximately 23″, so I cut a strip about 12″ x 4.5″, but again you will need to judge the size depending on the size of the basket you are using.

6. With right sides together, stitch the long sides of the strip together to form a tube and turn right side out. Stuff lightly with some polyester stuffing to within an inch of each end.

7. Cut some mittens from green felt and insert one into each end of the arm tube and stitch the ends closed securing the mittens in place. Glue a strip of white felt or wadding around each wrist.

Santa basket pics 0148. Wrap some strong thread around the centre of the tube to form two arms and glue the arms in place around the rim of the basket. I placed glue all along the seam line and then glued it to the basket in order to hide the seam 🙂

Santa basket pics 023

Santa basket pics 017

9. Make the head by covering a polystyrene ball with calico – simply place the ball in the centre of a large square of calico

Santa basket pics 046

10. Gather the fabric around the ball and tie it up with a hair scunci or elastic band.

Santa basket pics 039

11. Trim any excess fabric.

Santa basket pics 042

12. Tease out as many creases as you can to leave a relatively smooth area for the face.

Santa basket pics 045

13. The hat is just a triangle of fabric stitched into a cone shape and placed over the head (hiding the excess fabric and whatever you used to tie it up with!). Try to place the hat such that it hides as many of the creases in the calico as you can, leaving a smooth part showing for the face. Once you are happy with the placement, glue the hat to the head.

14. Decorate the face by gluing on some craft goggle eyes, a nose and add some cosmetic blush (or crayon) on the cheeks.  The nose is just a circle of calico filled with a little bit of polyester stuffing, which is gathered and stitched/glued in place.  You can use anything you like for the beard, from felt to wadding or cotton wool,  or you can make a cotton rag beard like I did.

Santa basket face

15. To make the cotton rag beard, simply cut 2 strips of calico 15″ x 3″, place one on top of the other and fold them in half length-ways. Stitch 1/4″ seam along the folded edge down the full length of the strip. Using small, sharp scissors, make perpendicular cuts about 1/4″ apart all along the raw edge side of the strip, taking care not to snip all the way up to your stitching. To get the lovely raggy look you will need to wash it and stick it in the tumble dryer.

Santa basket pics 033

16. Glue the beard in layers under the nose (there are 3 layers of cotton rag on my Santa).

17. Glue a strip of felt or wadding around the rim of the hat tucking any bits of beard under as you go.

Santa basket pics 012

18. Finally glue the head between the shoulders, add a bell to the hat and a wee bit of glitter here and there.

Ta-da!  You’re done! Put the kettle on – you’ve worked hard, time for a cuppa! 🙂

Santa basket pics 007

I think a snowman basket would also look great – you could knit him a lovely wee hat and scarf – must try that for next year 🙂 !

Right, I’d better get on with putting up the rest of the Christmas decorations … ♥ ♥ ♥

Natalie x

‘Morning Star’ … a journey of a thousand stitches

Actually, it is likely to be somewhat more than a thousand stitches. I guess it would be several thousand, but as I didn’t count them whilst I was making this wholecloth quilt, I will never know the exact number of times the needle entered the soft peachy cotton fabric.

Morning star 34

I have always been fascinated when I have come across old quilts or coverlets in museums or books. I always find myself craning over the rope barriers in museums to take a closer look, to find out more about the maker.

Morning star 29

My mind sets off wondering how those women managed to create such beautiful, intricate and timeless treasures without the luxury of a fabric store with all its choice of fine cottons, without a ‘daylight’ bulb and without all the notions and mechanical aids of today’s modern world.  How different it was for those women of my past who didn’t have a fabric ‘stash’.  It is nothing short of miraculous how they did it  and I love how their strength and tenacity is preserved in the fibres of those beautiful hand made quilts.

These are some of the things that I pondered as I stitched ‘Morning Star’ and in my own way I felt connected to those women as my hands busied themselves with the rocking motion of the needle. I yearned to create something timeless as they had done, to create my own little piece to enchant the eye with intricate patterns.

Morning star 23

The journey began with a sketch on squared paper, doing my best to draw out a ‘scaled down’ version of the actual thing.

Morning star 24

I knew that if I could come up with a design for just one quarter of the quilt, then I could mirror and flip the pattern to create a whole quilt. I started with a design for the centre star; I practiced drawing feathers and gathered quilting templates from magazines and books.

Morning star 25

I ‘scaled up’ the design to a life size version and I transferred it on to fabric, mirroring and flipping the pattern until the whole top was marked out.

Morning star 28

Morning star 26

Morning star 14

Morning star 30

Morning star 22

Morning star 21

Morning star 18

Morning star 16

I tried out several different thimbles, but the one that I found suited me best was a Clover leather thimble with a metal centre on the pad. By the time I had finished quilting ‘Morning Star’ I had worn a hole right through the metal on two thimbles and was on my third!

Morning star 9

Whilst the thimble protected my finger on top of the quilt, the finger on the underside took quite a battering and I was forced to stop on many an occasion when it would start to bleed from repeated stabbings.  I didn’t want to risk getting blood on the quilt!  Someone recommended that I use ‘udder cream’ on the afflicted finger which I found a highly amusing notion at the time, but I have to say it did help to sooth my chapped skin 🙂

Morning star 10

It delighted me to work simply with just the cloth and the frame. It was a real escape, simply to sit with the gentle rhythm of the needle as it gathered all those tiny stitches and lulled my racing thoughts.  I was able to lose myself in the doing of it and I loved it.

Morning star 33

Morning star 2

Morning star 15

Morning star 23

I stitched ‘Morning Star’ back in 2005, so it is already a few years old and my hope is that I might get to hand it down to a grandchild at some point in the future and tell them the story behind the stitches.

I would like to tell them about those strong women who have gone before us, who stitched by candle light, making do with the materials that they had.  I would like to tell them about how every stitch in a quilt represents a moment in time in the life of it’s maker and I would like to explain to them that, although every tiny stitch stands alone, it is also part of the whole; connected to the rest.

Just like a family.

Natalie x